Hello, amazing hair stylists! Ready to elevate your low fade haircut for men game? Whether you’re just starting out or looking to refine your skills, this guide is your ultimate resource. In the last article of this series, we talked about how to give the best men’s fade haircut. Today, we will look at a slightly different variation of the classic fade: the low fade hairstyle. The low fade is a timeless, versatile style that never goes out of fashion. We’ll walk you through the entire process, from the fundamentals to advanced techniques. Plus, we’ll highlight some top-tier shears from Hanzo to help you achieve precision and excellence in every cut.
Understanding the Low Fade
Before we dive in, let’s clarify what a low fade is. A low fade haircut for men involves gradually tapering the hair from the bottom up, starting just above the ears and the nape of the neck. This creates a smooth, seamless transition that complements various hairstyles, from the classic crew cut to trendy textured tops. The key is in the gradient: a low fade keeps the tapering subtle and close to the natural hairline.
Essential Tools for a Perfect Low Fade

Using the right tools is crucial for achieving a flawless low fade. Here’s a list of must-have items:
- Trimmers: A reliable set of trimmers with multiple guard sizes is essential for different levels of blending. Hanzo has a powerful trimmer, the Hanzo Trimmer, at just $99 which comes with a powerful 6000 rpm motor. A versatile and powerful tool with multiple guards, cleaning tools and power adapter.
- Combs: High-quality combs for sectioning and blending, ensuring smooth transitions. The Hanzo Comb 1 and Hanzo Comb 2 are two good combs for smooth, static-free styling.
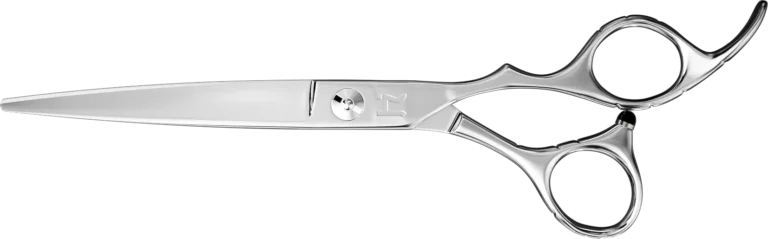
- Shears: Precision shears are a must for detailed work. Check out the Hattori Hanzo HH8 Talon for a versatile option. We will be using these amazing shears to demonstrate how to point cut and refine the fade after trimming is done.
Step-by-Step Guide to a Perfect Low Fade

1. Consultation and Preparation
Begin with a thorough consultation. Understand your client’s style preferences, lifestyle, and hair type. This helps tailor the cut to their needs and ensures they leave happy. Customer’s do not know the difference between a low fade, a skin fade, any variation of fade. It is important for the hairstylist to talk the client through various kinds and variations of fade. This is not as bad as it seems – just keep a few pictures on the counter and show them to your clients interested in fade haircuts.
Pro Tip: For clients unsure about specifics, start with a more conservative fade. You can always go shorter, but growing it back takes time.
2. Initial Cut

Start by cutting the top to the desired length. This helps you visualize the fade and create a balanced look. Professional hairstylists can pull off a fade cut without any shears but have a point cutting and one texturizing shear on hand can help create a softer, smoother look. We will be using a Hanzo HH8 Talon with #4 guards to begin with and then if the customer demands, will reduce the guard number gradually. Comb through the hair to remove tangles and ensure even sectioning. Use shears to cut the top section evenly. Start from the front and work your way back. For thicker hair, use a thinning shear like the Hanzo HH14T to reduce bulk without losing length.
3. Establish the Fade Line
The fade line marks where the tapering will begin. For a low fade, this line should be just above the ears and around the nape. Begin by establishing a guideline around the head. This is where the fade will start transitioning. With the clippers, start from the bottom and work your way up to the fade line, ensuring an even cut.
4. Blending
Blending is the key to a smooth transition and a professional finish. This step will differentiate a good fade from a great one. Switch to a higher guard (e.g., #3) and blend from the fade line upwards. This softens the initial cut and starts the transition. Use a comb and shear-over-comb technique to blend any harsh lines, maintaining control and precision. Pay extra attention to tricky spots like behind the ears and the nape. Use a smaller guard or freehand clipper work to perfect these areas.
5. Detailing
Detailing brings the whole look together. Clean up the edges and refine the fade for a polished look. Use trimmers to clean up around the ears, sideburns, and neckline. This sharpens the overall appearance. For extra sharpness, use a razor or detailed trimmer to outline the hairline and any hard parts. Hanzo has amazing Nano blades which are the perfect accessory for stylists and barbers. These blades are made with premium stainless steel and feature a micro guard. Hanzo also has a folding and straight razor.
Advanced Tips On Cutting Low Fade Haircut For Men
- Texture Matters: Use a texturizing shear like the Hanzo HHVT1 Mamba Texturizer to add dimension to the top, creating a more dynamic and versatile style.
- Guardless Clipping: Mastering the art of freehand clipping can create an even smoother fade, allowing for more control and precision.
- Shear-Over-Comb: This technique allows for greater control and precision, especially with the right shears, and is crucial for blending and detailing.
Conclusion
Perfecting a low fade haircut is an art that requires the right technique, patience, and, most importantly, the best tools. With this guide and Hanzo’s exceptional shears, you’re well on your way to mastering the low fade. Keep practicing, stay creative, and your clients will keep coming back for that flawless fade. Happy cutting! ✂️