The high and tight haircut is a simple yet stylish haircut that is popular among men. It’s known for its clean, sharp look and is often associated with the military, but it is also a favorite in everyday fashion.
As a hairstylist, mastering this classic style can attract many clients who want a neat and professional appearance. In this tutorial, we will guide you through the steps to give the perfect high and tight haircut, making sure it’s easy for you to follow and simple for your clients to understand.
What is a High and Tight Haircut?

The high and tight haircut is a men’s hairstyle where the hair on the sides and back is cut very short, almost down to the skin, while the hair on the top is left slightly longer. The contrast between the very short sides and the longer top gives it a clean and structured look.
There are different styles of high and tight haircuts:
- High and tight fade: Where the sides gradually blend into the skin, creating a fading effect.
- Buzz cut high and tight: Where both the top and sides are cut very short, almost the same length.
- Crew cut high and tight: Where the top is slightly longer and can be styled for a more casual look.
This haircut is especially great for men who prefer low-maintenance yet sharp looks.
Tools You’ll Need
For executing a precise high and tight haircut for men, several professional-grade tools available on Hanzo‘s website are highly recommended. These shears are crafted for sharp, clean cuts, which are essential for this style.
Here’s a breakdown of the best shears for the job:

These shears are perfect for detail work and precision cutting, especially when blending the short sides with the longer top section.
2: HH14T Shimatta Texturizing Shears
 These 26-tooth texturizing shears are excellent for removing weight and adding texture to the top while blending it smoothly with the short sides and back..

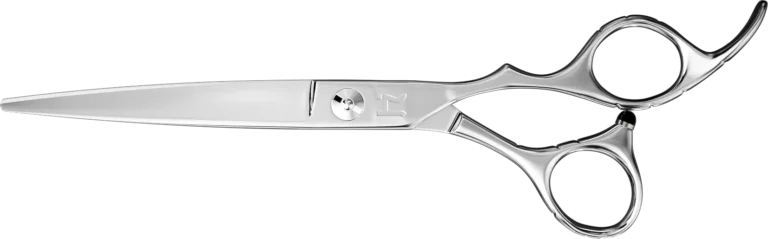
With longer blades, the HH8 Talon is great for efficiently cutting larger sections, making it useful for trimming the longer top in a high and tight style. It’s perfect for barbers who need precision and speed

For stylists who prefer shears that work well for both scissor-over-comb techniques and detailed finishing touches, the Mamba shears offer versatility.
Consultation with Your Client
Before starting the haircut, it’s important to ask your client what they want. The high and tight haircut has different variations, so asking a few questions will help ensure the client is happy with the final result:
- How short do they want the sides and back to be?
- Would they prefer a fade or a clean shave on the sides?
- How long do they want the hair on top?
By understanding their preferences, you can tailor the haircut to their specific style.
Step-by-Step Guide to Cutting the High and Tight

Here’s how to give a high and tight haircut step-by-step:
Step 1: Prepare the Hair
- Start by dampening the hair slightly with a spray bottle if needed.
- Section off the top part of the hair using clips to separate it from the sides and back. This will help you work on the short sides first.
Step 2: Cut the Sides and Back
- Attach the shortest guard (such as #1 or #2) to your clippers. Begin at the base of the head and move the clippers upwards.
- Make sure to stop when you reach the point where the sides meet the top. This is usually around the temples or just above the ears.
- If your client wants a high and tight fade, switch to a longer guard as you move up. For example, start with a #1 at the bottom and use a #3 or #4 as you move higher up, blending the hair smoothly.
Step 3: Blend the Top with the Sides
- Once the sides and back are cut, switch to a longer guard to blend the longer hair on top with the shorter sides. This prevents harsh lines and makes the transition smooth.
- For clients who want more length on top, you can use scissors instead of clippers. Hold sections of hair between your fingers and cut to the desired length.
Step 4: Trim the Top
- Use scissors to fine-tune the top hair if your client prefers more length. For a neat, uniform look, trim the hair evenly across the top, using the comb as a guide.
- If the client prefers, you can leave the top slightly messy or textured for a more modern, relaxed style.
Step 5: Shape the Edges
- Use your trimmers to clean up the edges of the haircut. Shape around the ears and define the neckline. The sharper and more precise the lines, the cleaner the haircut will look.
Creating a Fade
For clients who prefer a high and tight fade, the blending process is key:
- Start with the shortest guard at the base of the head, where you want the hair to be the shortest.
- Gradually increase the guard size as you move upward, blending into the longer top.
- Use a professional hair cutting comb to check for uneven blending and adjust as necessary.
A well-done fade makes the haircut look smooth and polished.
Styling the High and Tight Haircut

While the high and tight is a simple style, a little bit of product can enhance the look:
- Textured top: Use a light pomade or styling cream to add texture to the longer hair on top.
- Slicked back: For a more formal look, use gel or pomade to slick the top hair back.
- Messy look: For a casual, relaxed vibe, run a small amount of wax or styling paste through the top hair using your fingers.
Each client will have their own preference for how they want the top to look, so be sure to offer different styling options.
Maintenance Tips for Clients
To keep the high and tight haircut looking fresh, recommend your clients visit every 2–3 weeks for a trim. The sides and back will grow out quickly, and regular maintenance is key to keeping the sharp, clean look.
Encourage them to use light styling products at home to keep the top looking neat without making the hair greasy.
Mistakes to Avoid
Even though the high and tight is a straightforward cut, there are common mistakes that hairstylists should avoid:
- Cutting too high: Be careful not to go too high when cutting the sides. The top should remain distinct from the sides to avoid making the haircut look uneven.
- Not blending properly: If the transition between the short sides and the top isn’t smooth, the haircut will look messy and unfinished.
- Ignoring the neckline: Always take the time to shape the neckline and clean up the edges with a trimmer.
Different Hair Types and the High and Tight Haircut
This haircut works on various hair types, but some adjustments may be needed:
- Straight hair: This is ideal for the high and tight because it holds its shape well and allows for crisp lines.
- Curly hair: Curly hair may require more frequent trims to keep the sides neat, but the longer top can give the cut a unique and stylish twist.
- Thick hair: For clients with thick hair, use thinning shears on the top to reduce bulk while maintaining the shape of the haircut.